Note: You will need an Onside Teams subscription to get this functionality
The Visited Properties tab is where you're going to find, add, delete, and maintain the properties your team visit.
By adding your properties to the Visited Properties list, your team will be able to check-in to them when they visit, even if the property owner or manager doesn't use Onside. The contact person will also receive check-in notifications via sms message when your staff visit.
To find out more, check out this video or follow the guide below.
Adding properties
After clicking the green 'Add' button to the top right of the page, you'll see a screen like the one below.
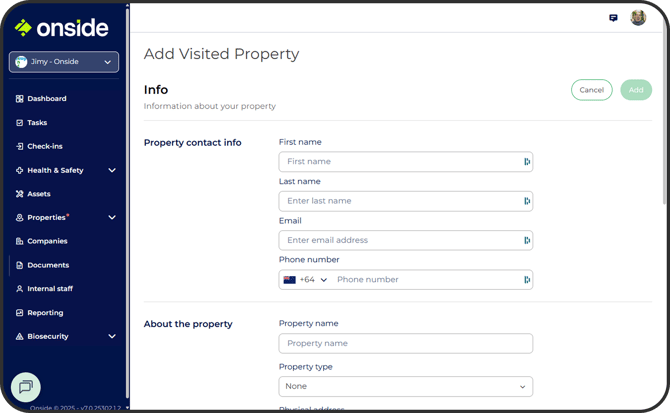
- Property contact info - This is who you would like to receive notifications when your staff check-in to the property. If you provide a phone number, they would receive a txt message (Unless they've claimed the property, more on that later).
- About the property - Give the property a name your staff will recognize, as well property type and the address.
- Unique Identifier - If your company has a code or number to reference this property for your own uses, you can add it here. You'll then be able to search the Visited Properties list by that ID.
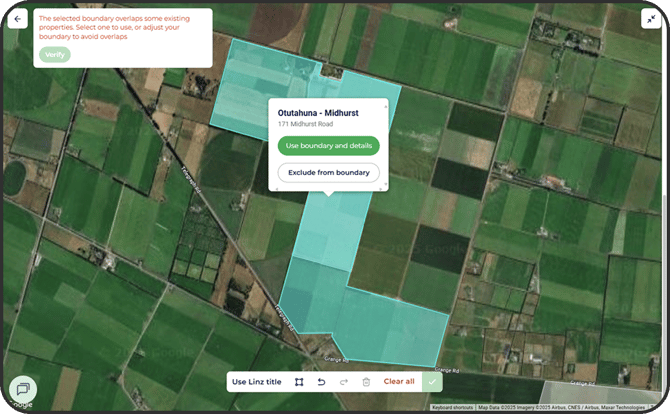
- Boundary - Draw the boundary for the property. If you're in New Zealand, you can also select 'Use LINZ title' and click where the boundary is for the LINZ title.
If you try to put the boundary down in a place that already has an Onside property, you will be provided with a suggestion to either use the existing boundary, or auto edit your boundary to exclude it.
Property status
When you start adding properties to this page, you may notice some will show as claimed and others unclaimed. This is because properties in this list have a status, and the status determines what you're able to do with them.
.png?width=670&height=416&name=Visited%20properties%20(7).png)
-
- These properties have been claimed by the Onside user shown in the 'Property Contact' column. They manage that site and are responsible for what is shown to Onside users when checking in.
- Any Onside user can check-in to claimed properties.
- If you add risks to the property, only your staff and the property admin can see them. The property admin can choose to make the risks visible to all Onside users or not.
- You will not be able to change the property boundaries.
-
- These properties are only visible to companies in Onside who have an Onside Teams subscription and have added the property to their account.
- You can change visited property boundaries, names, and addresses, as well as add risks, emergency info, jobs, and property rules by clicking on the property's row.
- If you add risks to the property and later on the property is claimed, the property admin can see the risks and choose to make the visible to all Onside users or not.
- When your staff check-in to an unclaimed property, an optional will pop-up during check-in giving the option of sending an sms message to let the Company contact know they've arrived.
Property Contacts and Company Contacts
Property contacts - Only show for properties which have been claimed. The person listed is managing the property in Onside.
Company contacts - These are your company's point of contact for that property. When your staff check-in to an unclaimed property, an optional pop-up will appear, giving the option of sending an sms message to let the company contact know they've arrived.
To change the company contact, click on the 3 dot menu to the right of the contact, then click 'Edit Contact'.
Sending invites
If you would like to suggest Onside to a company contact, you can do that from the 3-dot button to the right of the property's row. They'll receive an email like this.
Note: This only applies to Unclaimed properties
Delete a property
Properties can be easily deleted by clicking on the 3 dot menu to the right of the contact. If you delete an 'unclaimed' property from your list, your staff will not be able to check-in to it.
If you have any questions or need any help, you can reach us on 0800 ONSIDE (NZ), 1800 112334 (AU), or email Support@onside.co
If you have an idea for an improvement to Onside, you can add it directly to our product board.