We're excited you're giving the Onside Kiosk a go. The Onside Kiosk is a check-in option included in the Onside Complete and Enterprise plans, designed specifically for tablets. This is a great way to capture your visitors' check-ins if they don’t have the app on their phone. This can also be used in offices, wineries, and events.
Below you will find a step by step guide on how to set this up.
To set up you will need
- A tablet to run the Onside Kiosk on that still receives regular updates, we recommend a Samsung Galaxy Tab or iPad. It will also work on most computers and smartphones. However, if you do choose to use one of these other devices, we may not be able to offer the same support and user experience.
If you're using an Android tablet, try this article. - A power source for the device to be plugged into.
- An internet connection for the tablet.
- Signs or notices directing visitors to go to the shed/office/house to sign in.
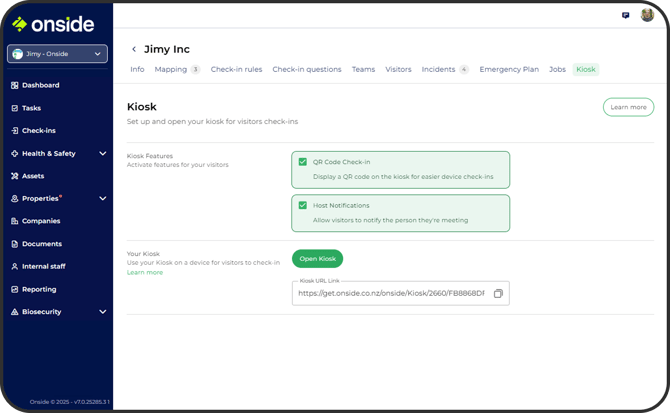
- Your property's unique Kiosk URL.
Setting up an iPad for your Onside Kiosk
Watch the video below to see how to set up your device.
Add the Kiosk to your tablet's homescreen
- Hold your iPad in landscape mode
- Open Safari web browser and log in to your account via the Onside website.
- Tap on your property and navigate to the 'Kiosk' tab.
- Tick the checkbox if you'd like to show a QR code on your Kiosk for contactless check-ins, and 'Host Notifications' to advise your staff when they have a visitor
- Tap the 'Open Kiosk' button and wait for your page to load. You will be automatically logged out of your account when you do this for added security.
- Click on the box with the arrow pointing up next to the address bar. Select 'Add to home screen'. We also recommend bookmarking the page.

- Give your Kiosk home screen icon a name e.g. Willow Park check-in, click 'Add' and then click your home button to close the page.
- You should now see a new icon on your home page. Click on it to open.
Set up Guided Access
In order to lock your tablet to the Onside Kiosk so visitors don't go into things they shouldn't, you'll need to enable and set up Guided Access.
- Open your Settings -> Accessibility -> Guided Access.
- Enable Guided Access.
- Go to 'Display Auto-lock' and set to 'Never'.
- Tap on Passcode settings -> Set Guided Access Passcode. This will mean that only people with the code will be able to get out of guided access when it’s on.
- Go back to your home screen and open the Kiosk icon you've just created.
- Tap the AA button right next to the refresh button in the bar at the top.
- Select 'Hide Toolbar'.
- Press your home button 3 times quickly. If your iPad doesn't have a home button, try the power button 3 times or this guide.
- The first time you do this, it should ask you to choose your settings. Enter your lock code otherwise.
- Tap on the 'Options' button in the bottom left and disable Sleep/Wake button and Motion.
- Draw a rectangle on the screen, then change the shape to cover only the bar at the top of the screen.
- In the top right corner of the screen click 'Resume'.
When you want to get out of the Kiosk, press the home button (or power button) 3 times and enter your passcode to exit, then click end.
Extra Kiosk features
From the Onside web portal, you can activate these features for your visitors.
- QR code - Give your visitors the option of a contactless check-in by showing the property's QR code on your Kiosk.
- Who are you here to see? - Visitors will be able to choose who they are on your property to see. That person will then receive an email and notification to let them know.
That’s it. Now you're good to go for people checking in and out of your property with the Onside Kiosk. Give it a try yourself to see how easy it is.
If you have any questions or need any help, you can reach us on 0800 ONSIDE (NZ), 1800 112334 (AU), or email Support@onside.co
If you have an idea for an improvement to Onside, you can add it directly to our product board.