Keep up to date with the health and safety performance of your property, checking visitor numbers, what jobs are being done, etc from your Onside reports.
Risks, incidents, and check-ins
Firstly, log into your Onside web portal and click on the 'Reporting' option in the side menu.
-
 Choose if you'd like a Risk, Incident, Check-in report (includes arrivals), or a combination of all.
 -
Choose the date range (any incidents updated in the range will also be included).
-
Select the property or properties you would like to report on.
-
Select the file type, PDF or spreadsheet.
If you have multiple properties, try downloading a 'Combined spreadsheet' to see all your data in one file.
-
Click 'Download'.
Spreadsheet (CSV) reports have more information than PDF reports, such as responses to check-in questions and distance from property when checked out.
Click below for examples of the different report types.
Risk report
Incident report
Visitor report
How are risks ordered in the reports?
Property risk reports are ordered by when they were last modified, not reported. From the most recent to the least.
Onside Teams risk reports are ordered by date of report.
How are Incidents ordered in the reports?
Company incident reports - Ordered by Date of incident
Property incident reports - Ordered by alphabetical property name (if reporting on multiple properties), then by Date of incident.
If an incident is modified within the date range you've given, it will also show in the report, even if the date of the incident is outside the chosen date range, but has been updated in the timeframe.
How are check-ins ordered in the reports?
Check-ins are simply ordered from the most recent to the least.
Combined property reports will be grouped alphabetically first, then by most recent to least.
Tasks
The 'Filters' button on your Task dashboard page determines the data included in your task reports. Set your filters accordingly, then click 'Download report' above the search bar. If you choose a PDF report, you'll also be able to include task photos in your report.

Assets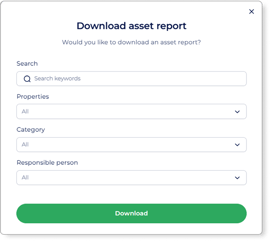
Accessible from the ![]() button of the Asset dashboard. A pop up will appear for you to narrow down how you would like your asset report generated.
button of the Asset dashboard. A pop up will appear for you to narrow down how you would like your asset report generated.
You can filter by
- Any search keywords
- Properties
- Category
- Responsible person
Forms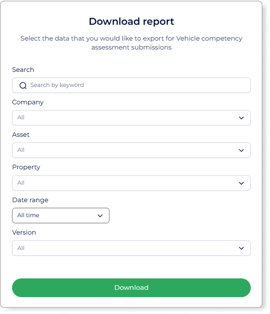
When a form has been used/completed in Onside, we call this a "submission". Generating reports for forms submissions can be done in three easy steps.
- Click on the form in your Onside web portal
- Click on the
 button next to 'Edit form' and choose 'Download report'
 - A pop up (shown right) will then appear for you to filter the asset submissions for your report. Choose your filters, then click 'Download'.
If you have any questions or need any help, you can reach us on 0800 ONSIDE (NZ), 1800 112334 (AU), or email Support@onside.co
If you have an idea for an improvement to Onside, you can add it directly to our product board.